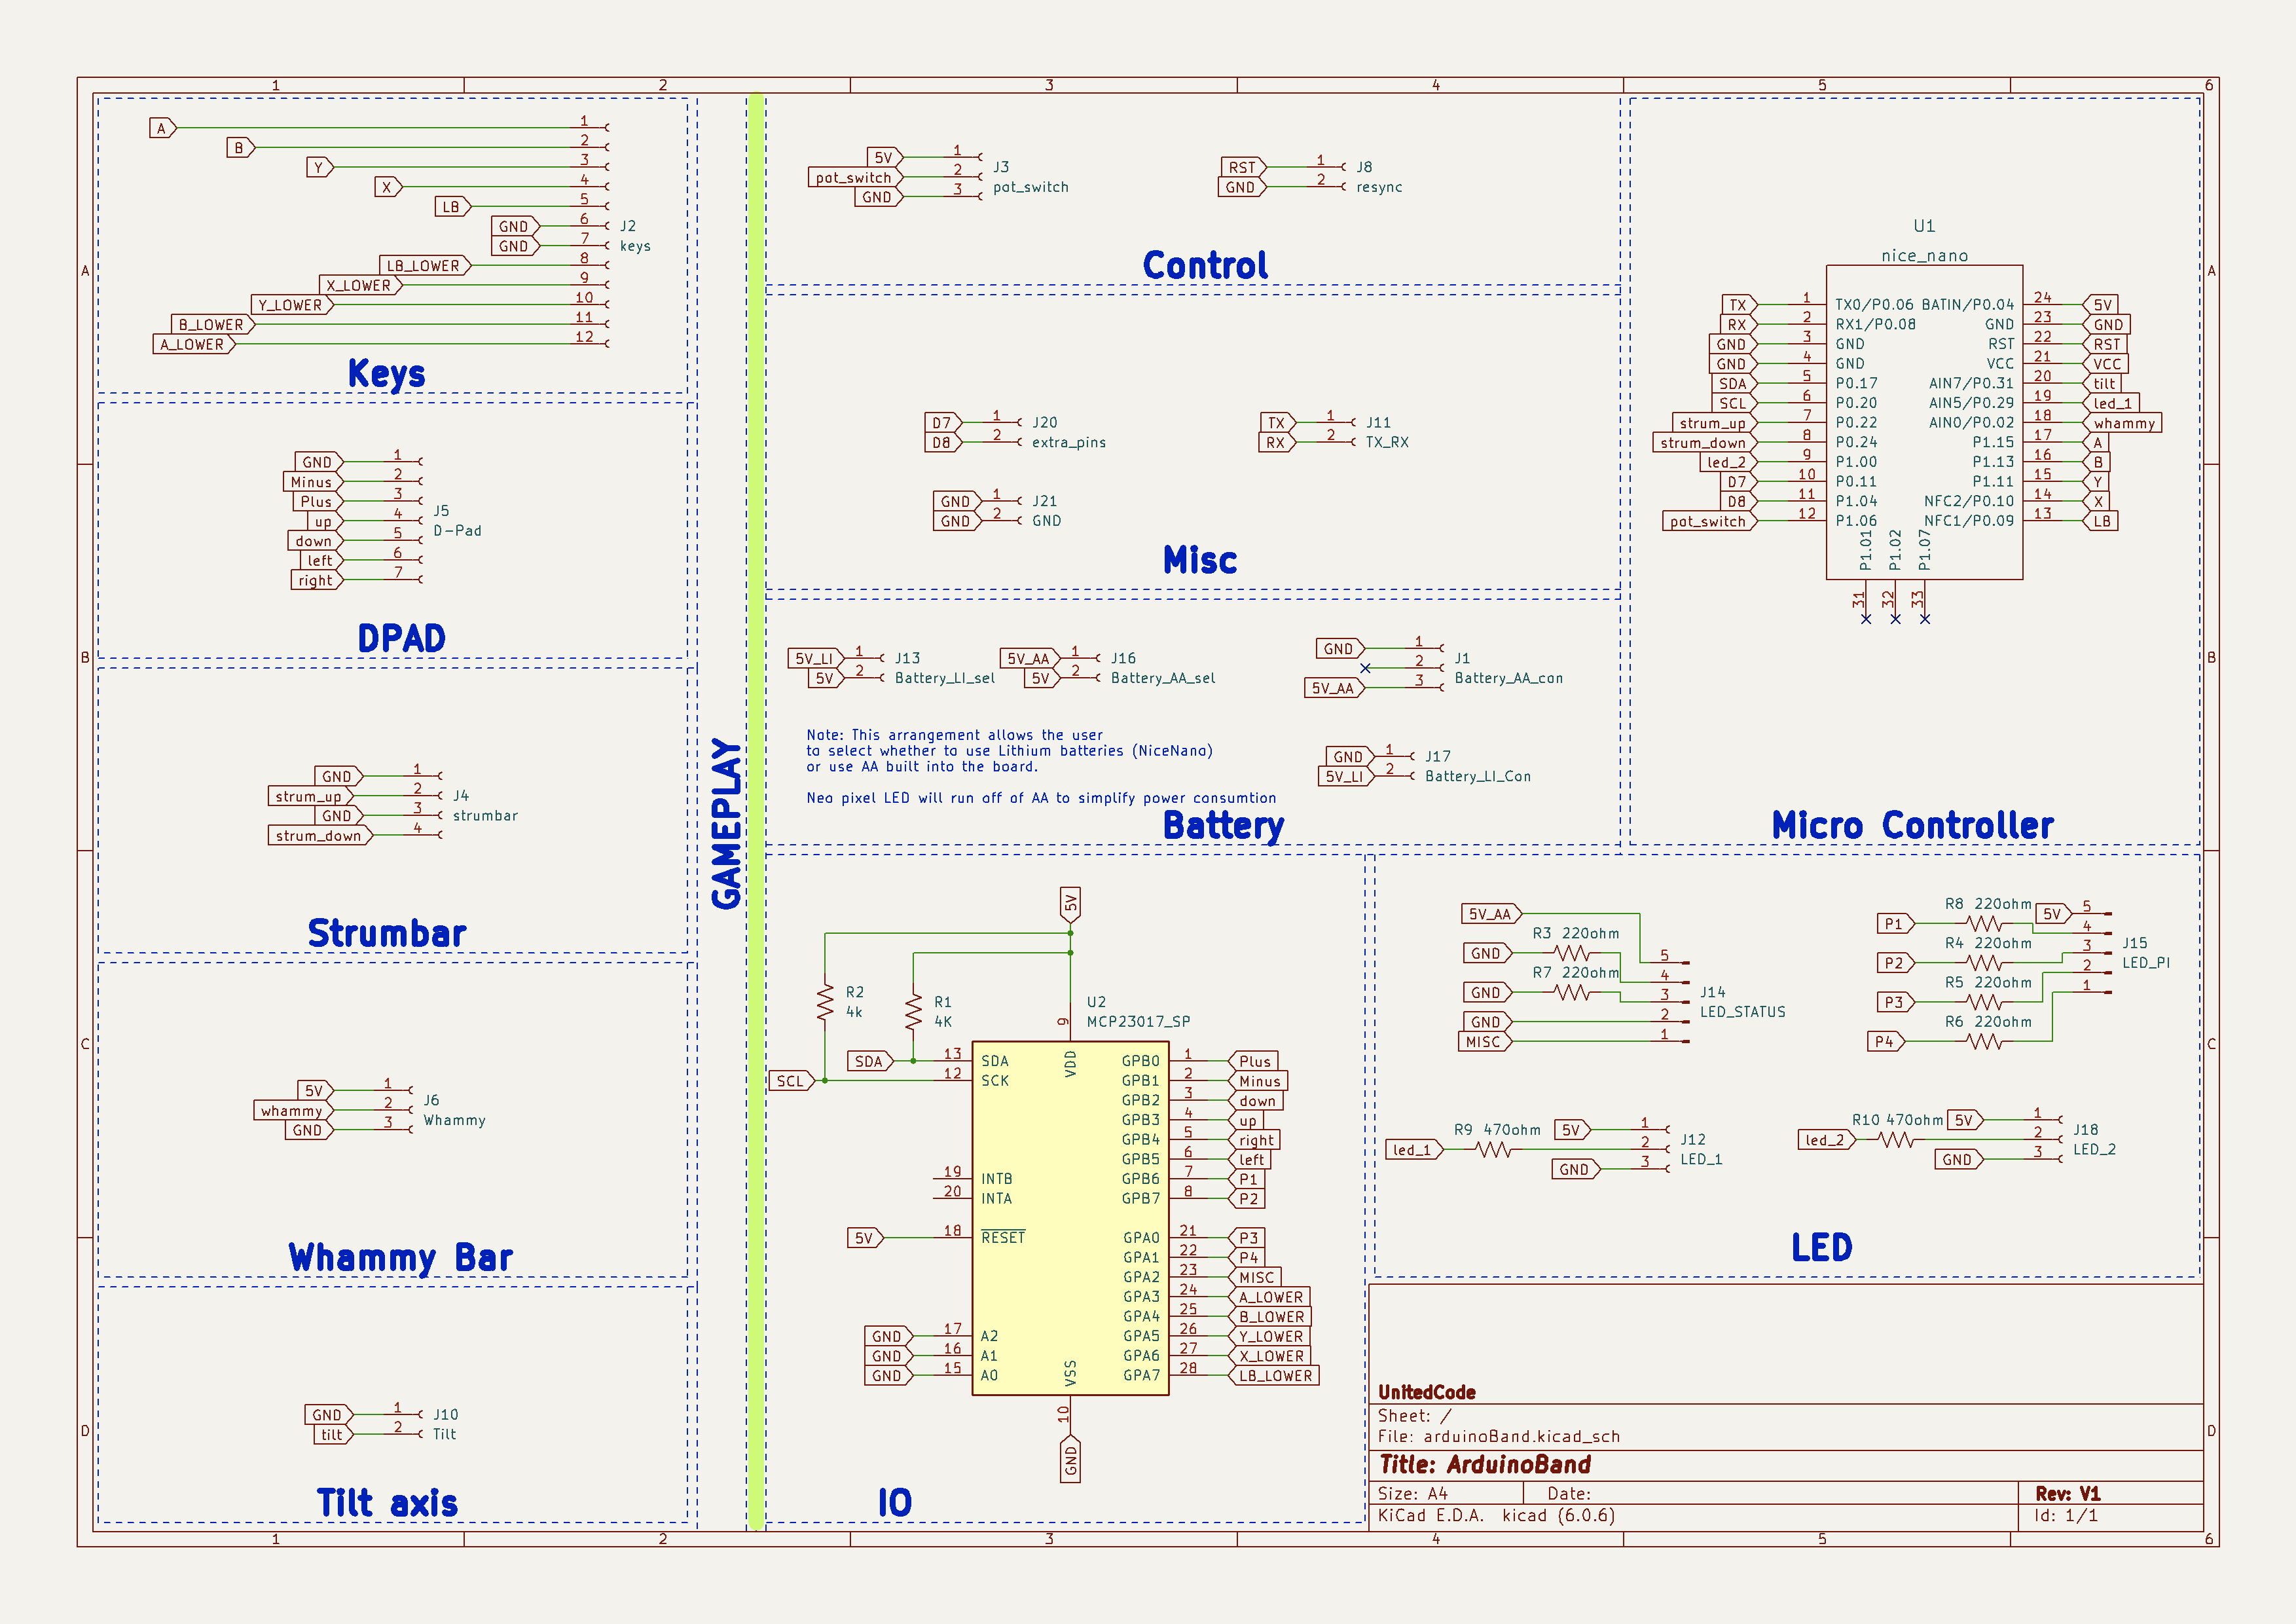
Arduino Band V1
A few years ago, I built a rockband guitar that lights up when you press down the keys (see 2020 post: The Plastic Guitar that Started it all). This project taught me a lot about designing a hardware project, but it wasn't really scalable. Making one took countless hours and to make another would require me to source way too many wires, solder way too many LEDs and buy an arduino Leonardo, which at the time of writing this article would cause 25USD.
Since making my first rockband Guitar that lights up, I've learned how to use KiCad, a software for creating PCBs, as well as learning how to make keyboards. The current keyboard that I am writing this on is a custom build called The Seahorse. These new skills have brought me back to a long time goal of mine, built a PCB for the Wii Rockband guitar that supports a Sparkfun ProMicro or any other embedded device that is the same pin layout, such at the Nice!Nano.

The first step of the processes was to go through my old designs and figure out how I had everything laid out. After which I decided to add a IO expander to help solve the low number of GPIO pin available. I chose the MCP23017 (I2C) IO expander for this project because it allowed me 16 extra GPIO pins for the cost of 2 (SCK and SCL).
I am unsure if I like my choice for the battery management, but for Arduino Band V1 I chose to include battery selector pins for whether the device is to be powered by the typical AA battery pack built into the guitars or if the batter will be a Lithium-ion battery. The latter choice would only really work with the NiceNano and as of writing this I don't know of a good way to program the NiceNano to work for this project.

The PCB design is made to replicate as best as possible the PCBs currently present in the original guitar. The placing of the JST connectors are in the same spots as the original board, allowing for an easy drop-in replacement.
This board is more of a test board, since as of the time of writing this. Nothing has been tested.