The Plastic Guitar that started it all
The Christmas tree was surrounded by huge boxes, we knew for sure this year was going to be one for the books. We gathered around anxiously as the first box was unwrapped. The words on the box seemed to shine as we stared at them, ROCKBAND 2. It was ours! We finally got the thing any adolescence in 2008 wanted, Guitar Hero or one of its clones. The rest of Christmas break was spent banging on the plastic drum heads, smashing plastic keys and my personal favorite, screaming into the mic. It was a time I could never forget, running through set lists of songs, so that we could unlock more. Getting booed off the stage because medium was too hard for pre-teens. Then the years passed, and slowly the plastic instruments got tucked quietly into a corner, where they sat and waited, yearning for the days of fret smashing.
University
When I first went to college, my heart began to yearn for the simple days of mashing keys and almost as if the universe was calling to me, I stumbled upon a Rockband guitar. I had a decision to make, do I send my Ramen money on a Rockband guitar or do I eat like a college king for a few days. The choice was obvious, and I gladly gave up the $2USD for the guitar.
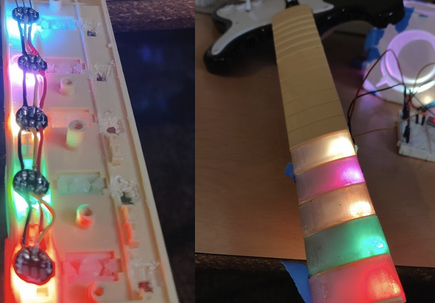
Many afternoons were spent gazing at the incoming notes as we struggled to keep up with the pace of expert mode. And then it all came crashing down. Late 2019 and early 2020 became one for the history books, Covid shut everything down and friends became a thing of the past, having more time on my hands, I did what anyone else in the time did, I scrolled through memes of the finest caliper. While I sat on the hard black couch of the apartment in deep focus. My pupils widen as an image on the black slab crossed my eyes. There on the screen of my cell phone, was a beauty beyond any that I had hitherto seen. The soft glow of green, red, yellow, blue and orange lights were all too captivating, and the construction of the device was all too simple. The guitar hero controller was something beyond my wildest dreams. It's buttons glowed as they were pressed and being a college student I knew that I needed LEDs in everything. A computer isn't fast unless it has that glorious glow of RGB LEDs, so by the same logic, a game controller can't be any good until it does the same. So the quest began, except I had 1 problem: my plastic guitars were Rockband Stratocaster guitars. It wasn't going to be as simple as drilling a hole in the existing keys and placing an LED inside. I had to come up with a better plan.
The keys
The first hurdle to overcome was the keys. The solid yellow/brown plastic didn't let much light through, forcing me to begin to look for other solutions.
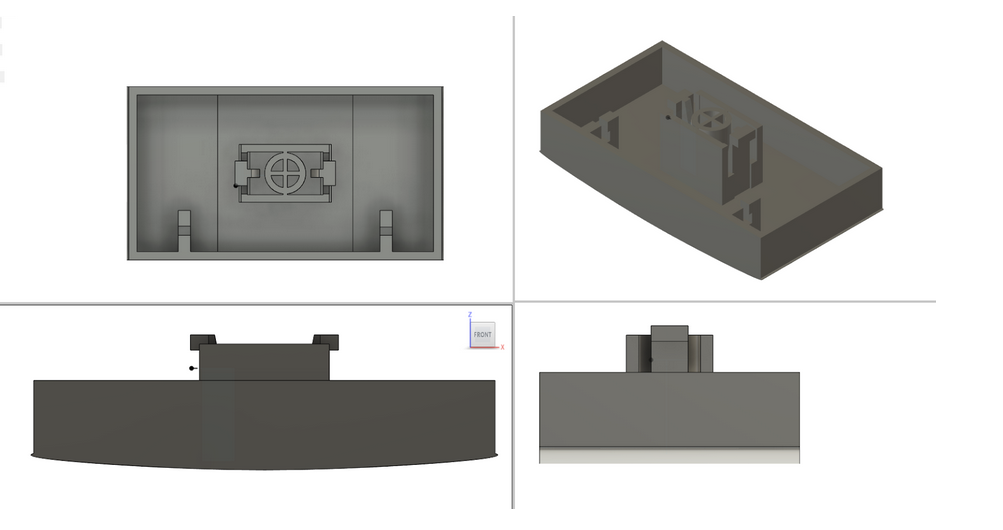
There was only one problem: I didn’t know how to CAD.
The side quest began with a lot of YouTube videos and mistakes. Once I figured out how to draw a line, we were off to the races!
Except I didn’t have a 3d printer, or even know how to use one, and there was also the issue of not having a precise measurement device, just an old wooden ruler. You might be thinking, “Just go buy the stuff you need”. But may I remind you of my expensive ramen taste? I mean, who pays more than 50 cents for a package of ramen? Well I was in luck, and that luck would have it that Uncle Sam was desperate to keep the capitalist system running that, he handed everyone a $600 check that they would inevitably pay off in inflation and rising costs of living. With my crisp government check, I bought A 3d printer and 300 bowls of ramen.
With the 3d printer in hand, the journey could truly begin. I printed off the first key and to my surprise it didn’t fit. I made some small tweaks to the design, only to find that it too had some issues. Furthermore, I continued to modify my design until it was “Good enough”
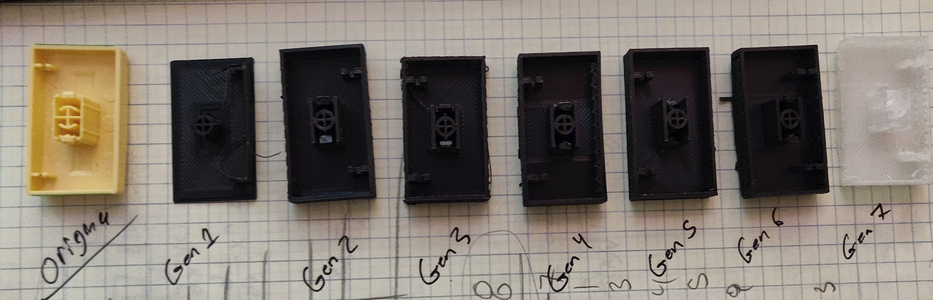
- Gen 1. Too small and the walls were too thin for the printer to print.
- Gen 2. The object was a perfect fit! Sadly there was no room for the button to slide up and down.
- Gen 3. The button had enough room on the sides to slide but the ends were too close to the middle.
- Gen 4. The middle piece was too small, it wouldn't push the button.
- Gen 5. The tabs that came off of the center extrusion were too brittle.
- Gen 6. The clip was extended so that the button had room to travel up and down.
- Gen 7. The left wall was nonexistent.
- Gen 8. Fit well, but is too loose in the guitar.
The Electronics
Now that we had buttons that worked, it was time to start on the electronics.
A poor design of the electronics
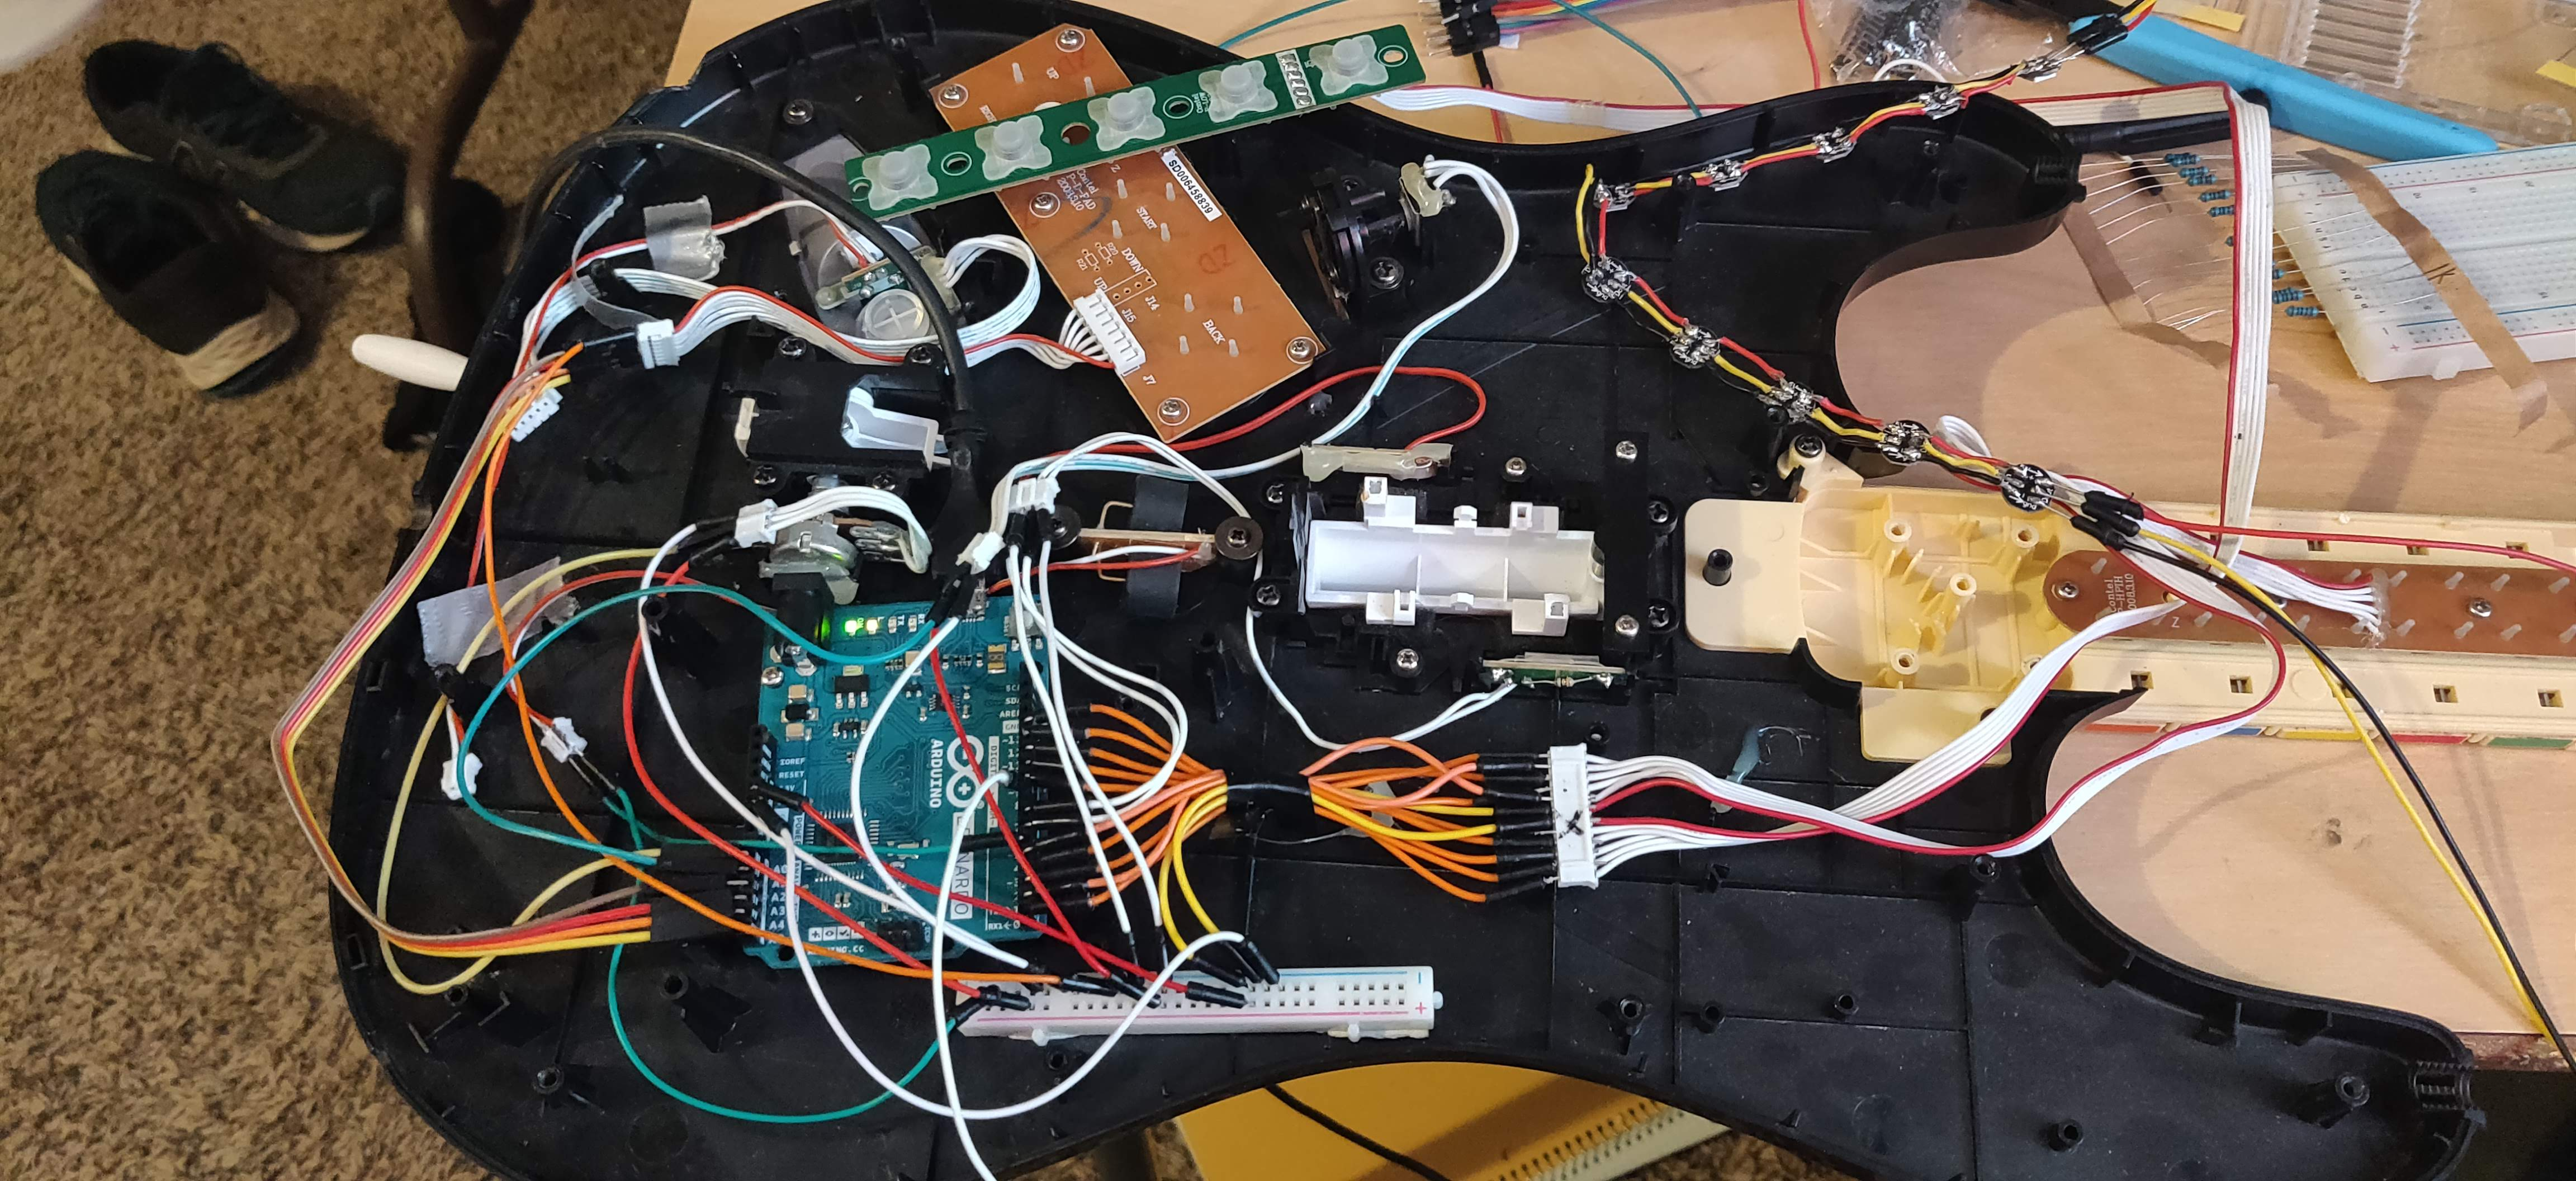
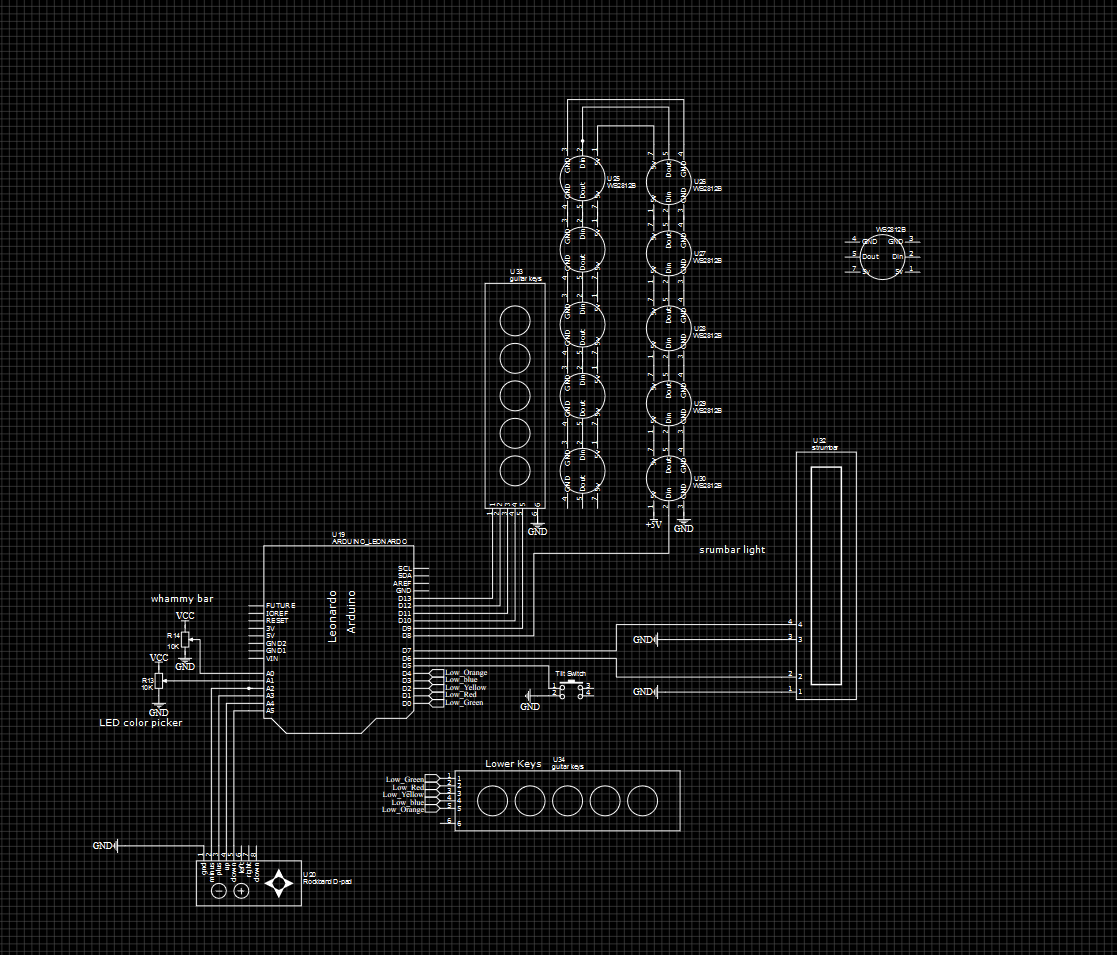 The sad thing about studying Software Engineering is that it doesn’t teach you a whole lot about how to create schematics for Electrical projects. So I attempted to create a wiring plan that made sense to me. The device had to be made with a HID capable device. For those of you that aren’t great at remembering acronyms, HID stands for Human Interface Device, or in laymen terms a device that can be used as a keyboard, mouse or joystick. I chose the Arduino Leonardo for this job, had I known about the pro micro at this time I would have used it instead.
The Leonardo didn’t have enough GPIO pins for all the keys I needed, and my skills at the time kept me from unlocking the IO expander chips or using a column row layout, so instead I wired both the lower keys on the guitar with the upper keys.
LEDs
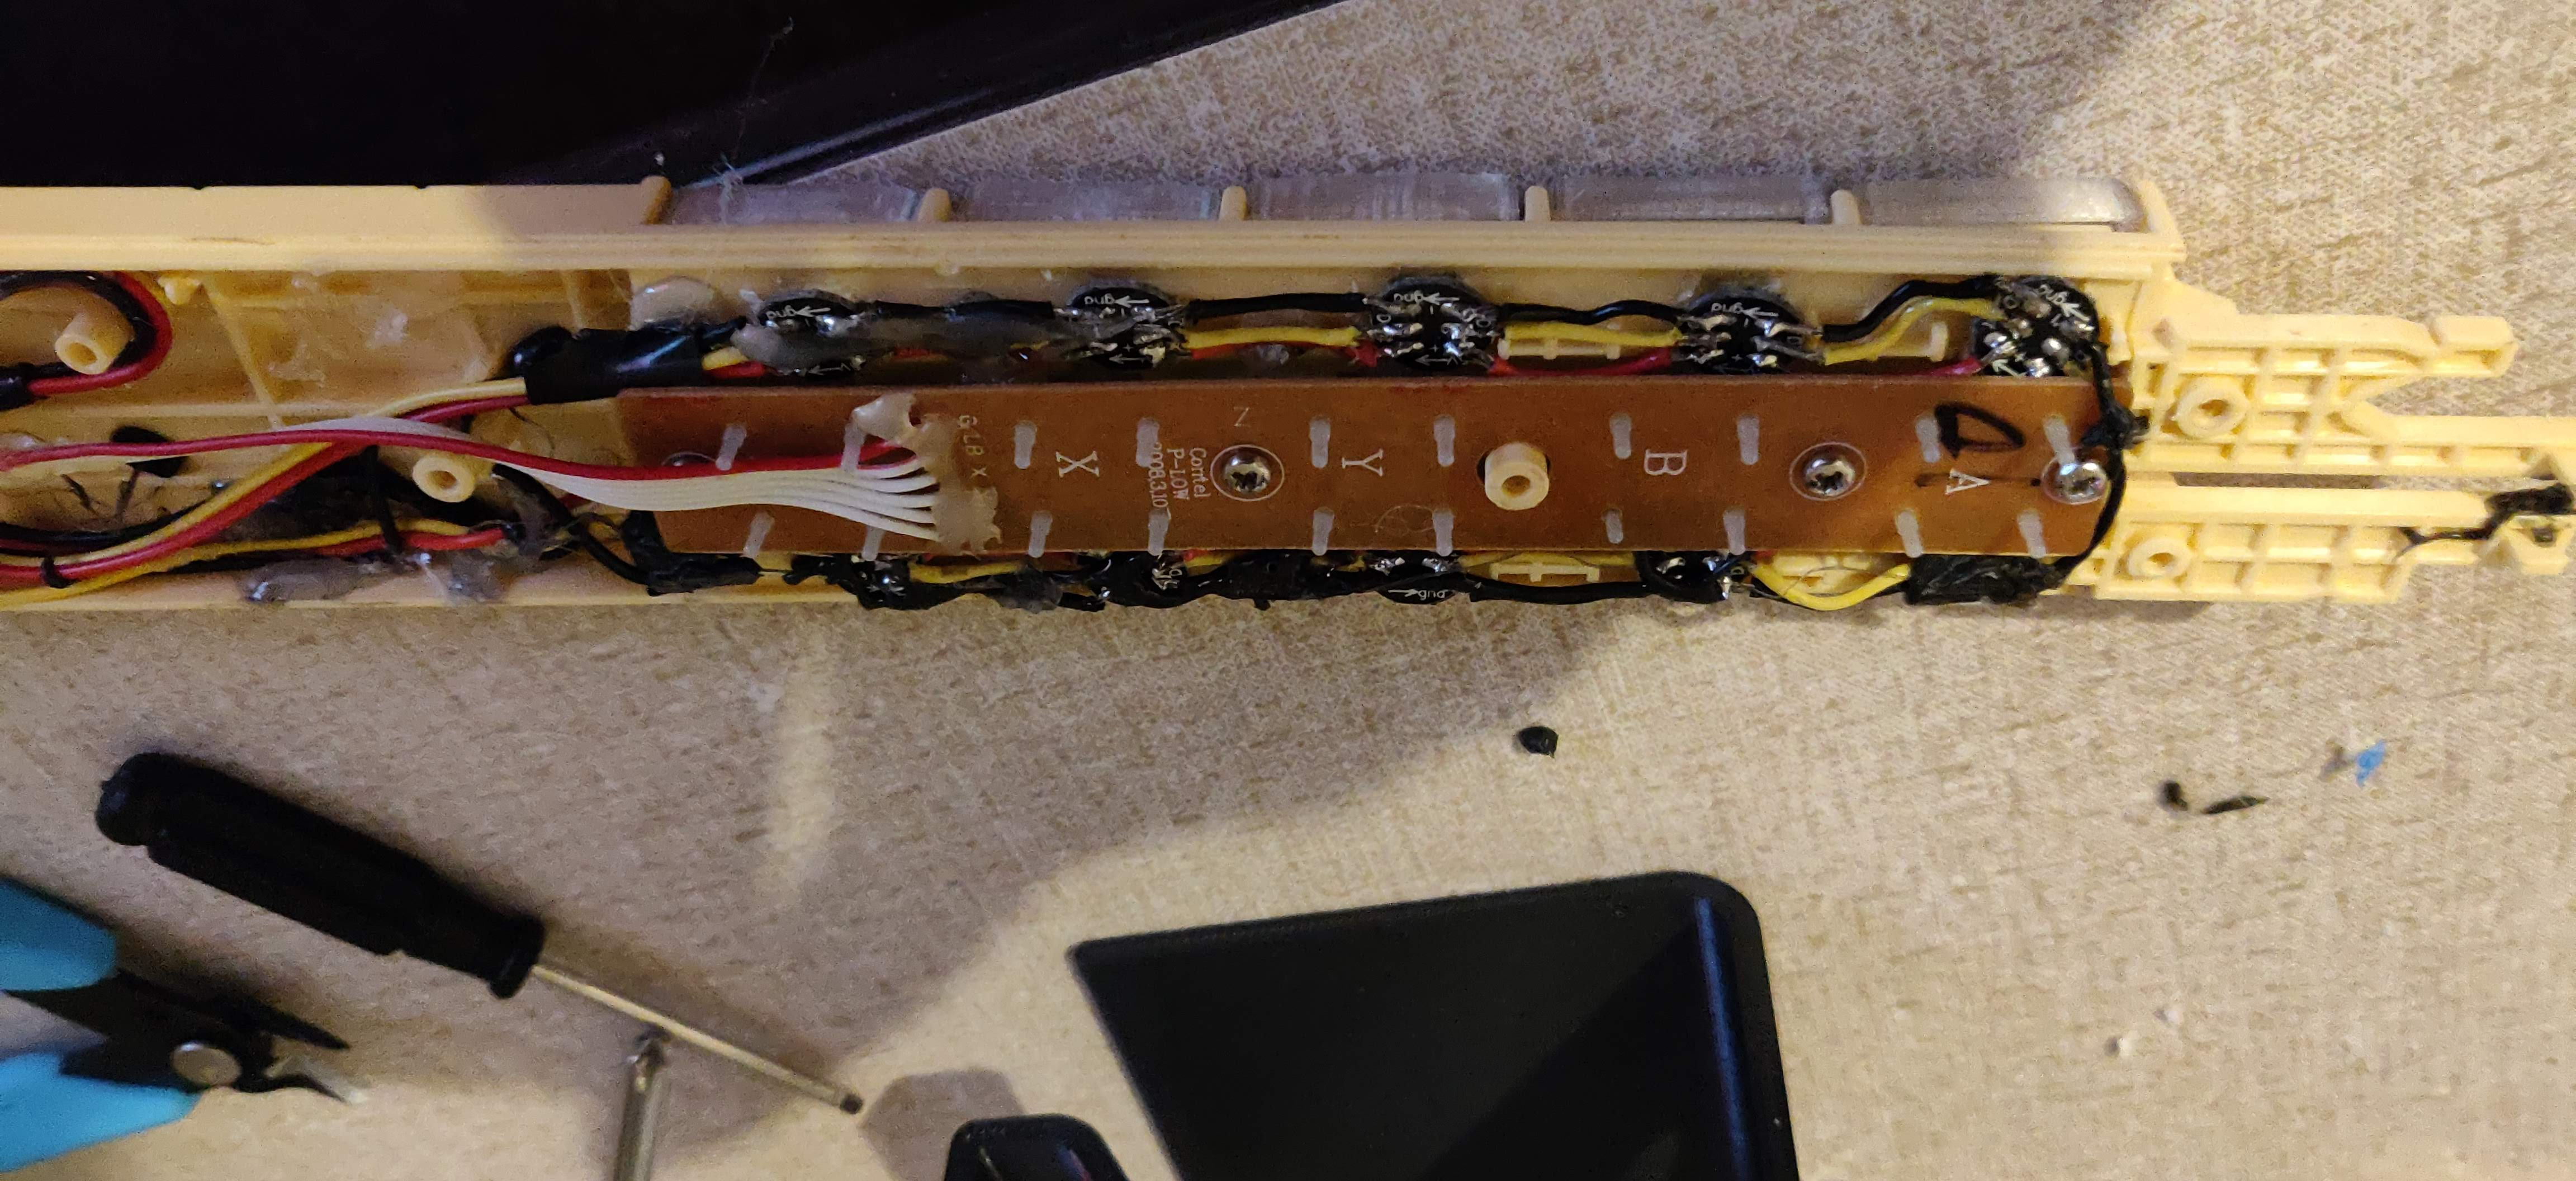
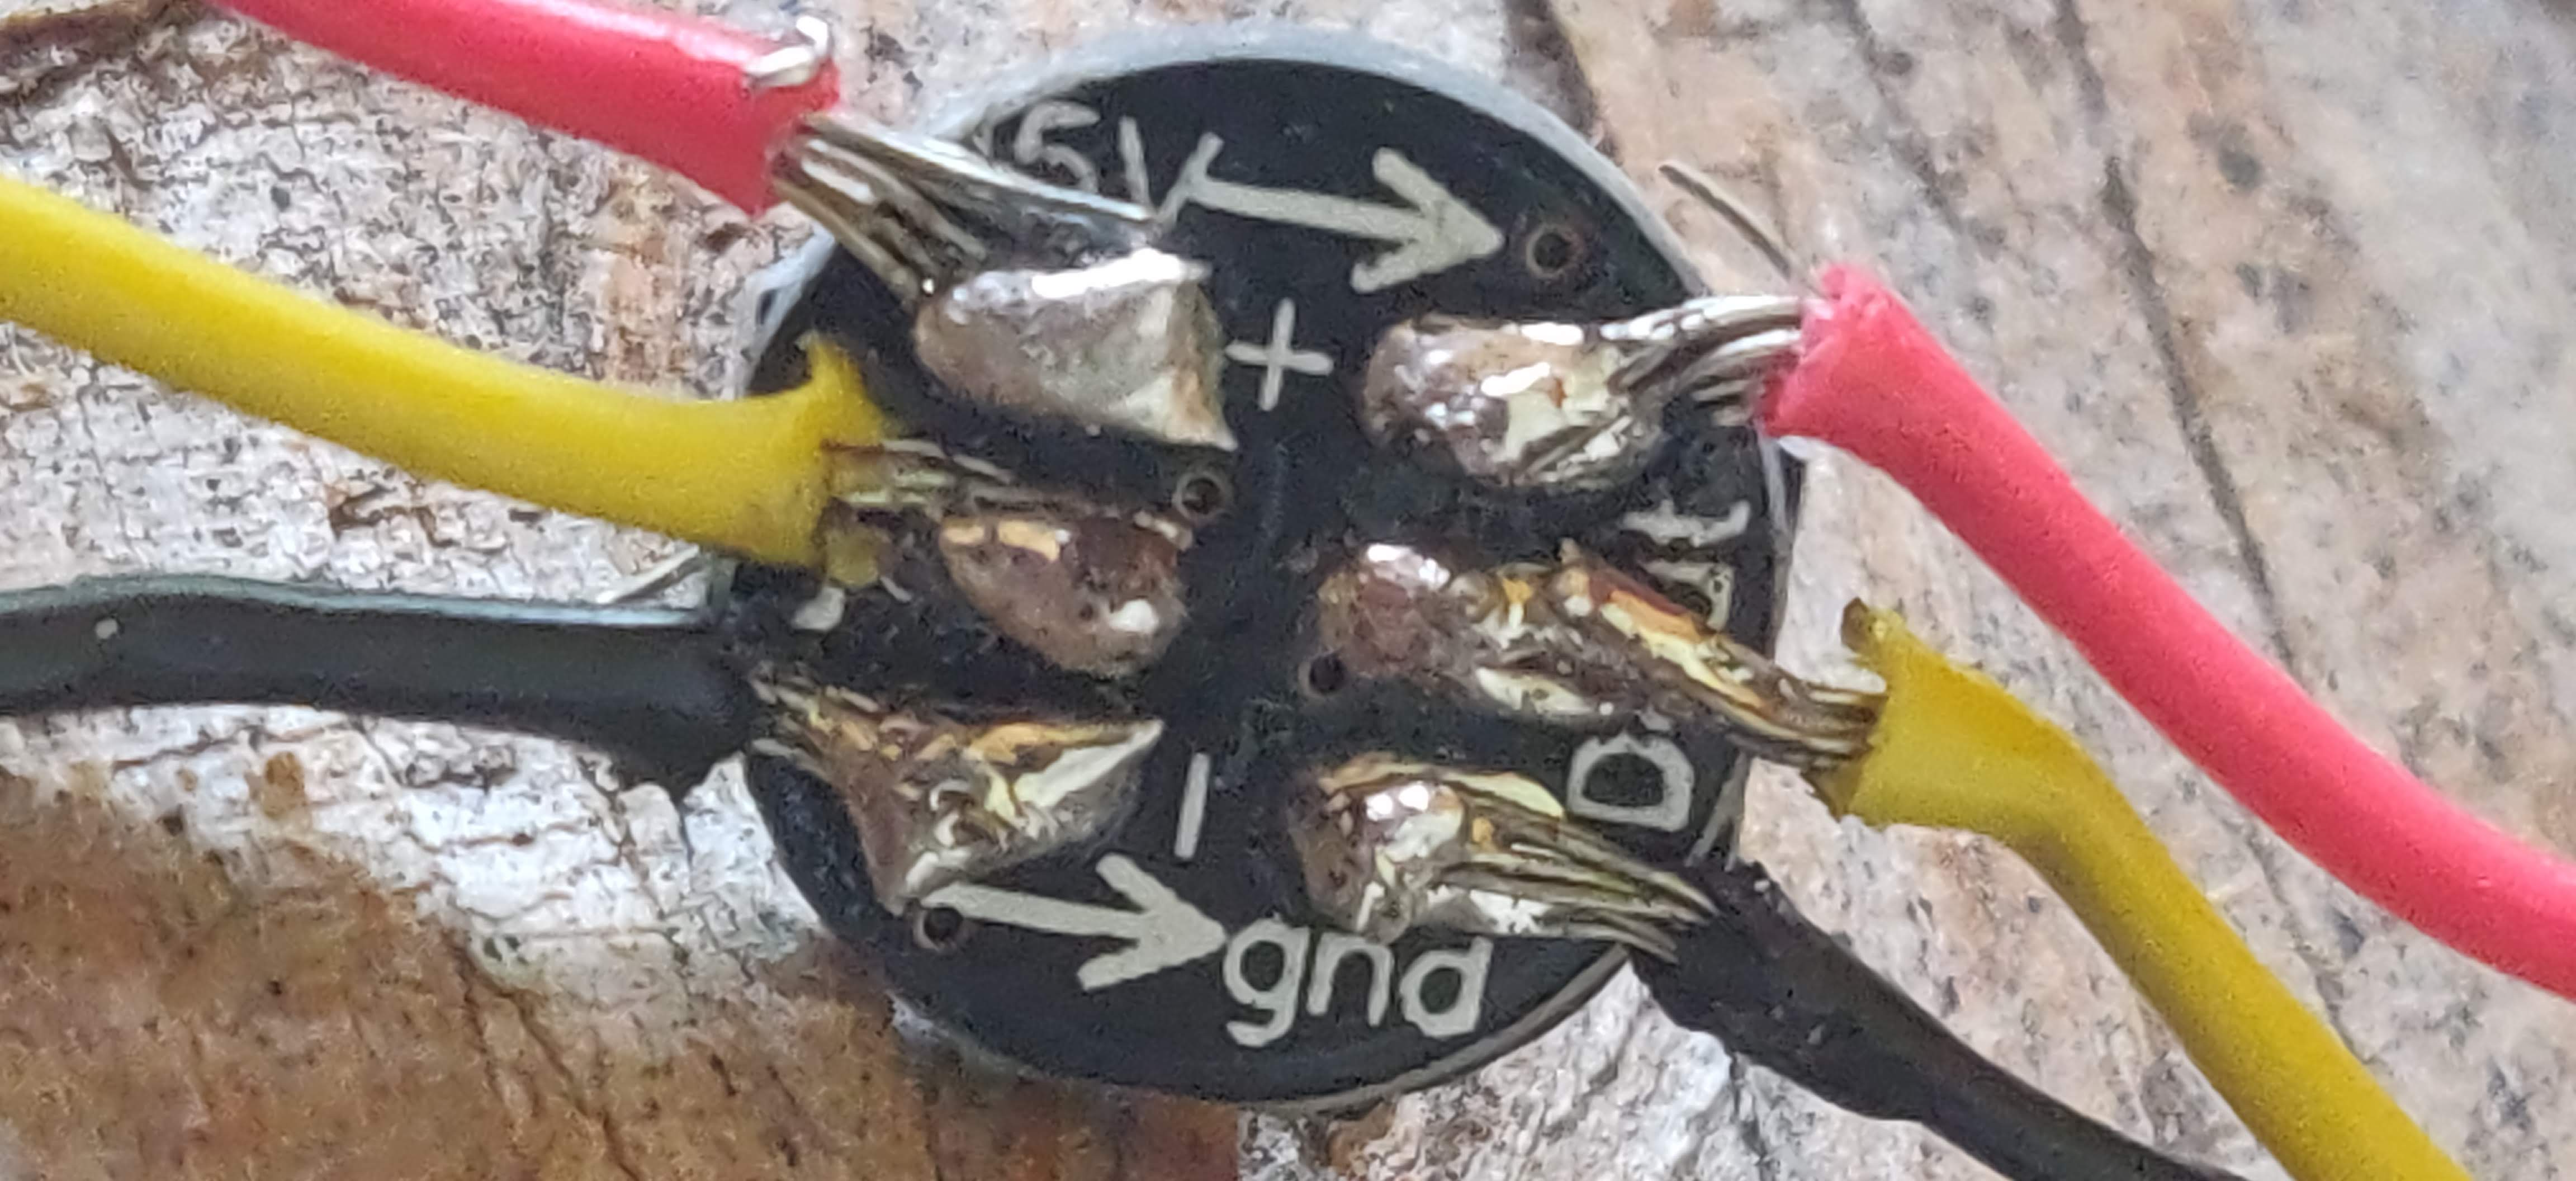
The LEDs were a particularly tricky part in the processes of this build. I chose the WS2812B LEDs because they were small, compact and were addressable, which were very important necessities for this project. What I had not considered was how hard it was going to be to put them all together. Remember earlier when I had talked about not having any tools, well a soldering iron was also one of the many things that I lacked. Luckily, I was living with my parents at the time, and they had a soldering Iron. Unluckily for me, who had never had any experience soldering. A soldering iron that simply plugs into the wall is not going to create very good results.
After 6 hours of laboring to solder a measly 10 LEDs, with 30 wire connections and 60 small solder joints. I plugged the wires in and hoped for the best. All I got was a smoke show. Upon closer examination, I discovered that the solder joints were not nearly as clean as I had hoped. So I had to start the processes all over again.
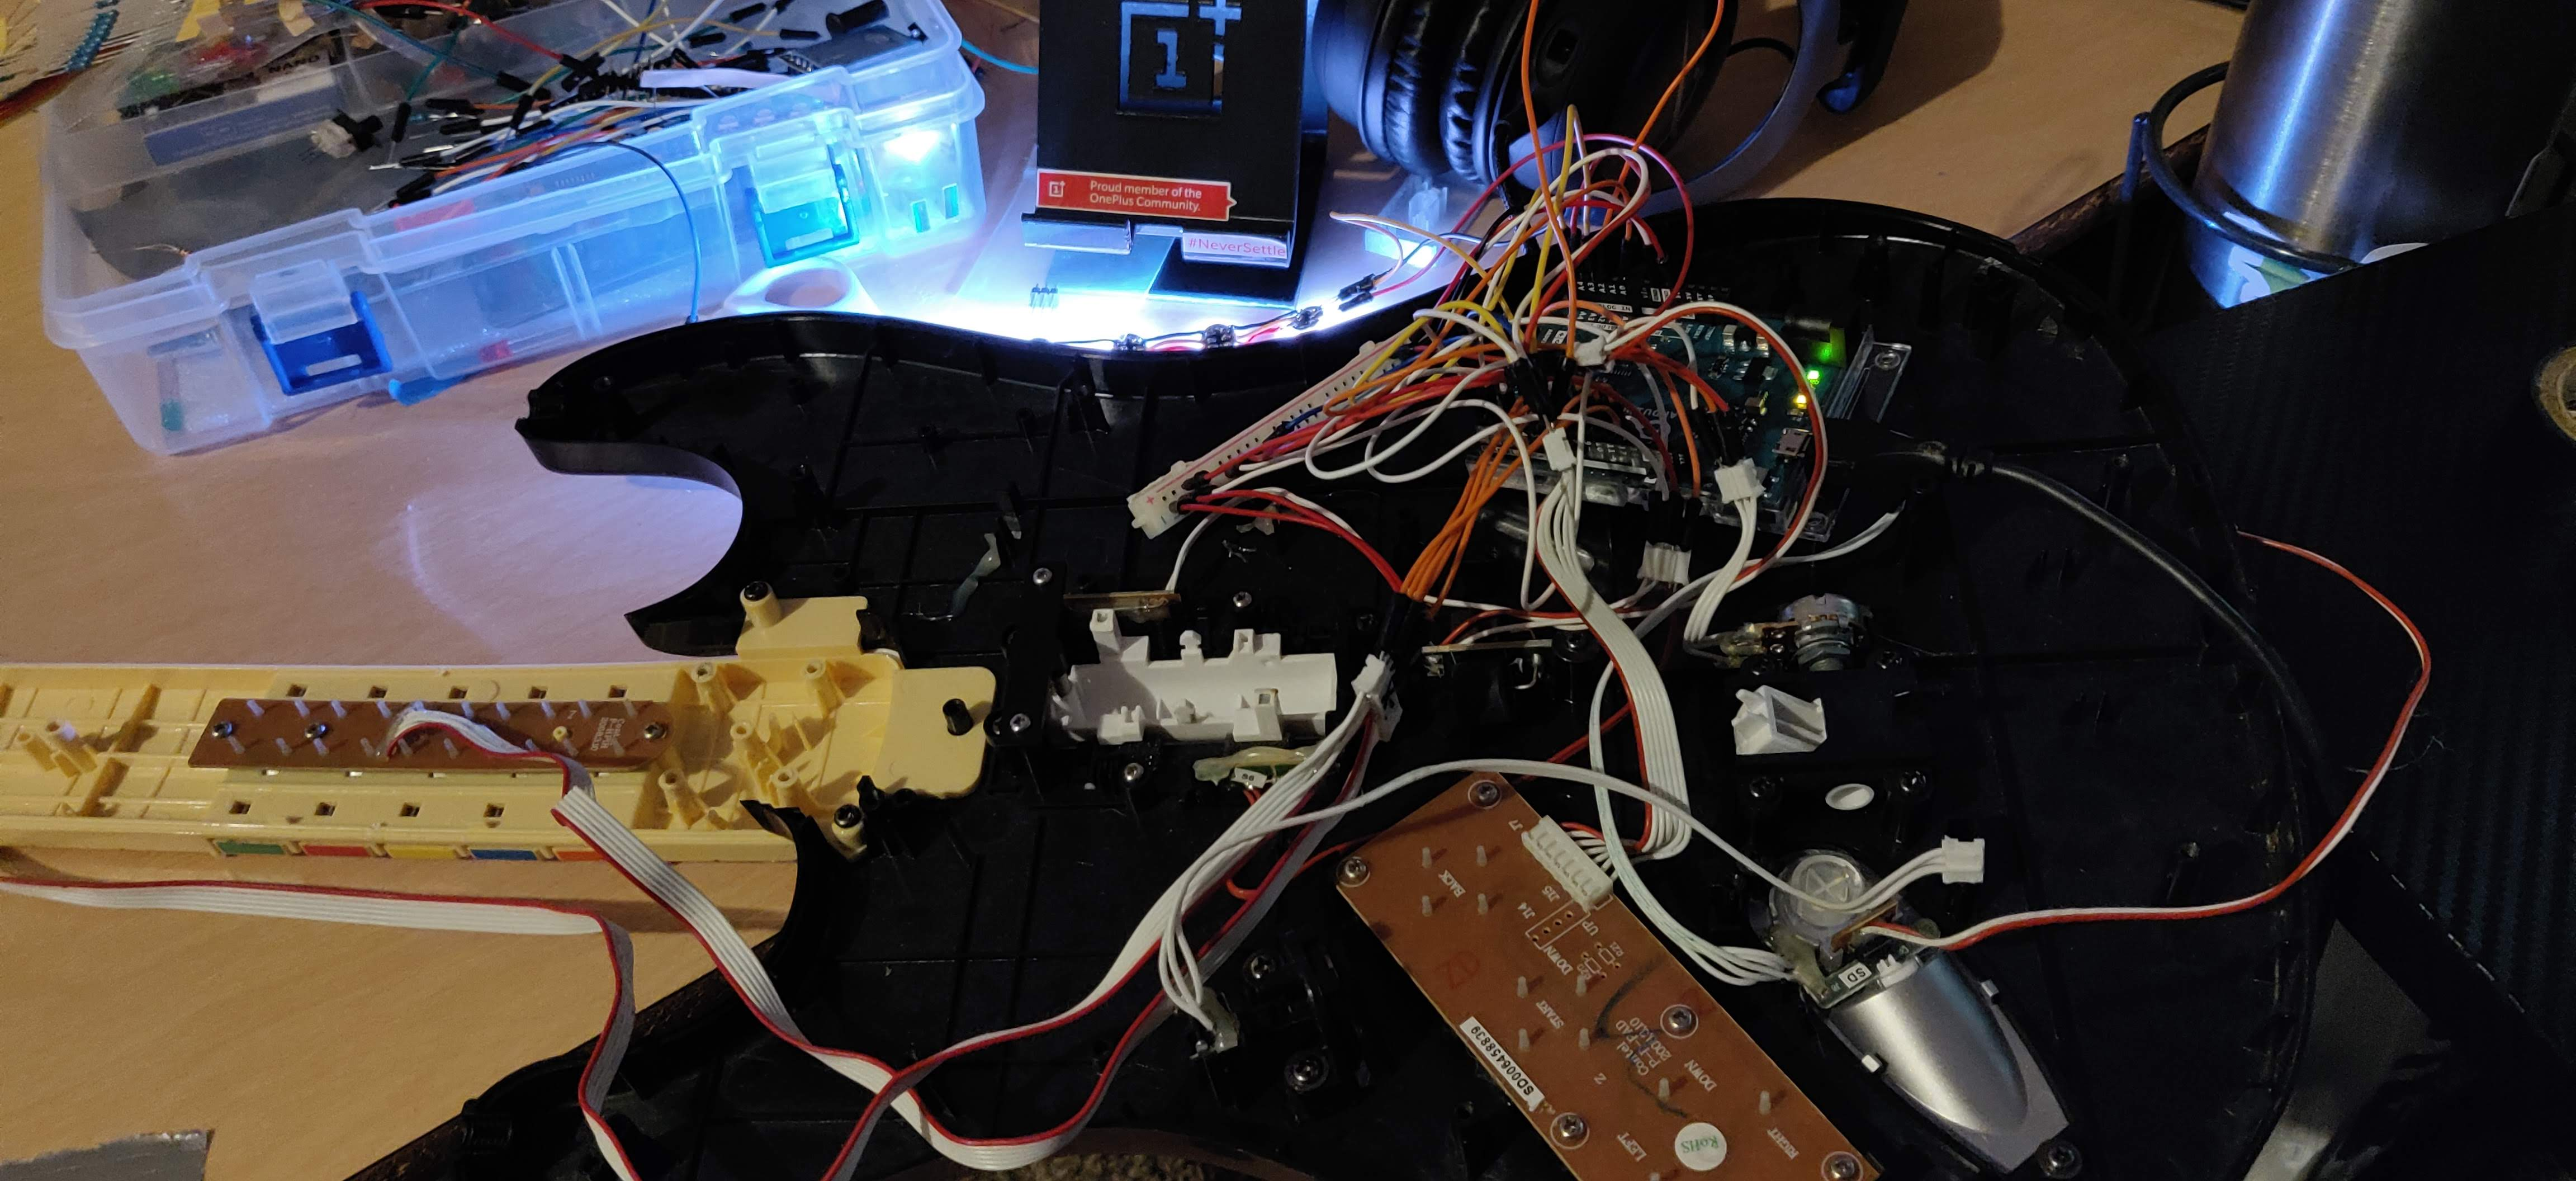
Next up was getting everything wired up. So I did the only logical thing, I put the wires in my pocket with the Arduino, walked around a little till they became a tangled mess and threw it down on the guitar, and sure enough it all worked!
I finished it off with a good bit of hot glue and sure enough it all worked like a charm!